Monday, December 30, 2013

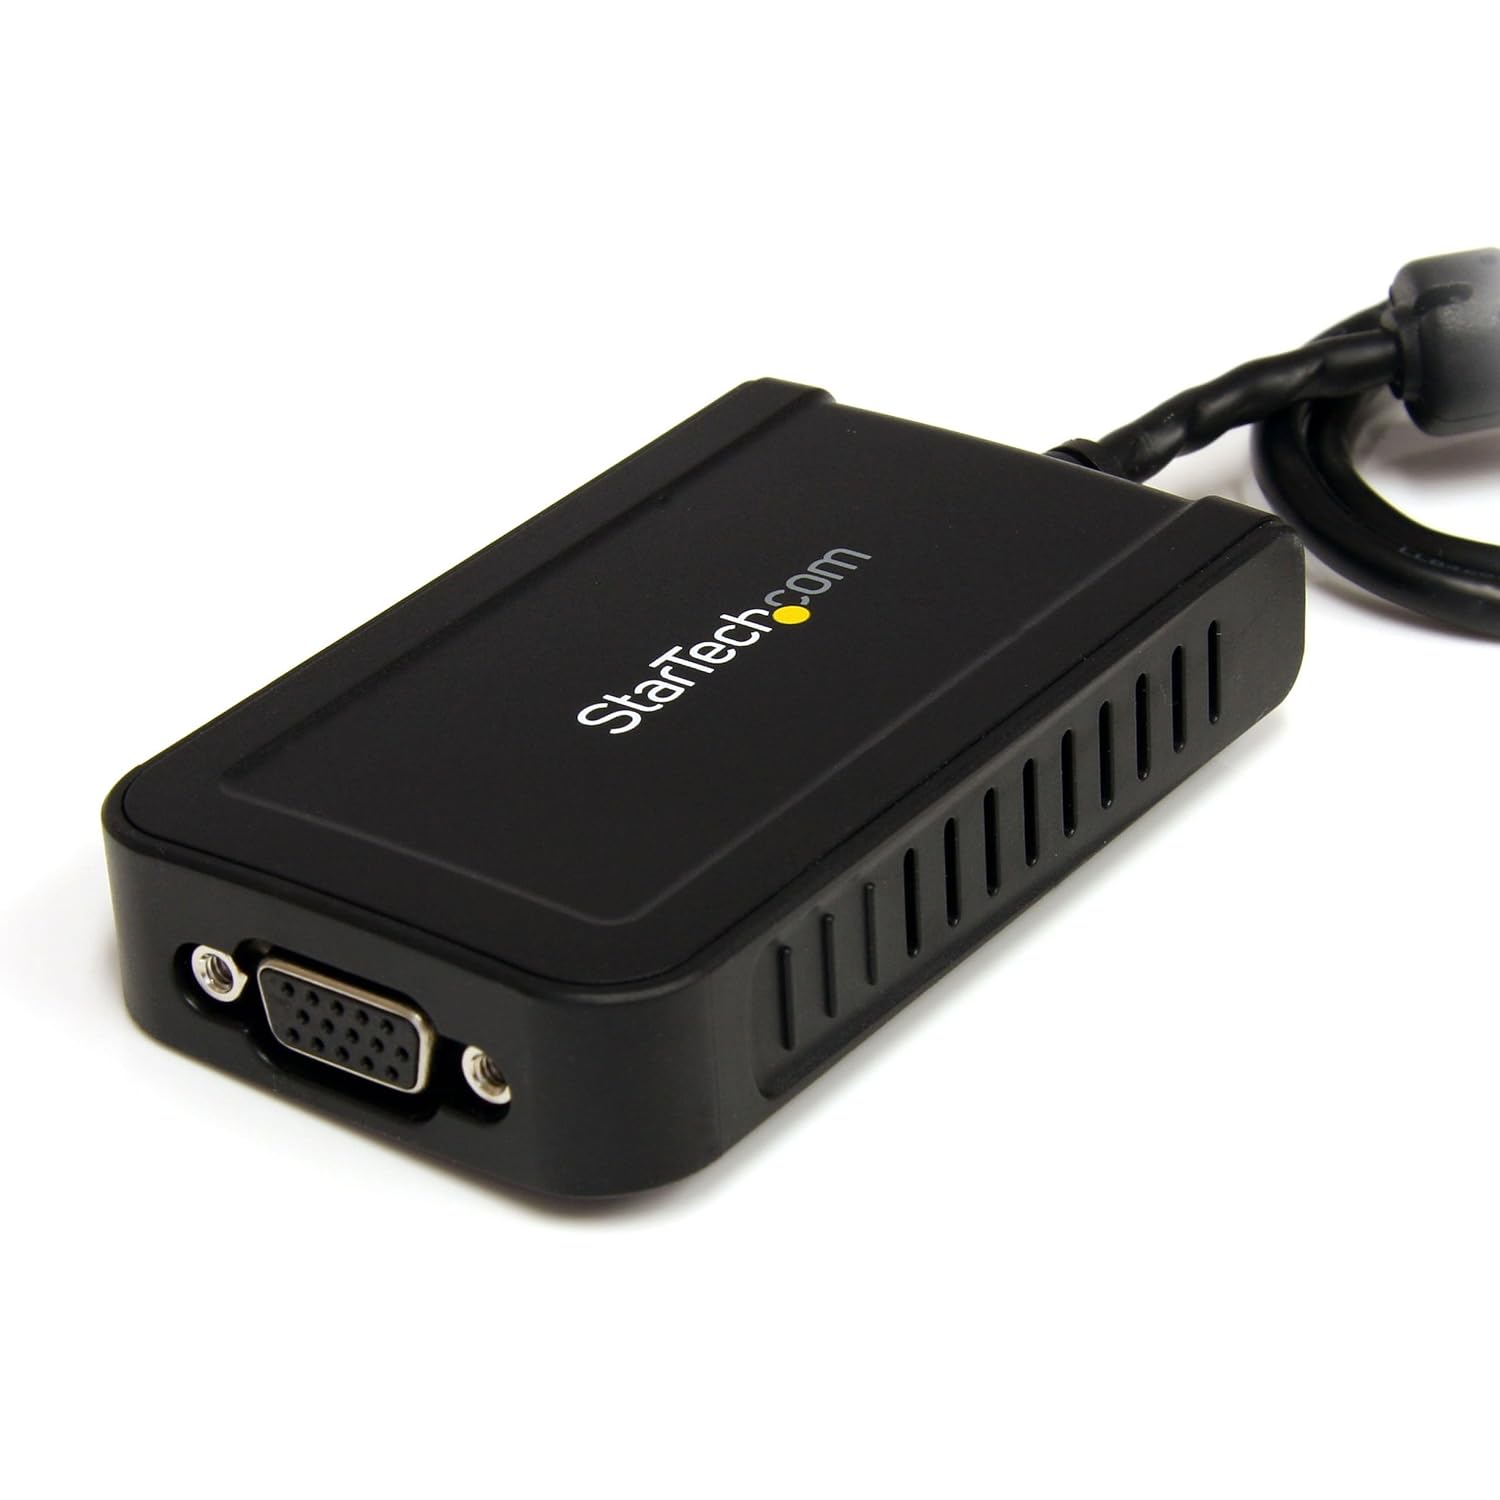
Because who doesn't need another monitor?


Not everyone is amazed when they come into my office, but there are those who look at the three monitors and are impressed, especially since one is my laptop, and the other two stream off of it. Most of us know how to hook up one extra monitor but what about two?

My solution to this problem fell upon me when a graphics card broke. The card itself didn't break, just the hookup that I was using to connect the monitor. As I limped by in those days I was forced to find another way (if only temporarily) to have a monitor.

I fixed my issue with a USB to VGA adapter. The beauty of this fix was once I got a new laptop I was able to use it to install my second extra monitor.

I don't suggest this as a permanent option for those of you that truly utilize multiple monitors, but for those that are thinking about it, or only need one on occasion I think it is a good midpoint to start. If you require (or be honest, you just want more don't you) multiple monitors, you will eventually need to set up your machine to run them. While most laptops can handle one extra monitor, you would probably need a desktop to handle more.

There are some draw back however to gaining an extra monitor the way I did:

1. It is running through a software which means it will never be as good as one straight from you graphics card.

2. It takes extra processing power, this means that if you are running a dated machine it will slow you down even more.

3. The refresh rate among other things is slower which will make it hard for you to do anything on this monitor that requires it, such as watching videos or playing games. (note: These will still work on your other monitors, simply not this one.)

Wednesday, November 27, 2013

Chrome Remote Desktop: A Reveiw

I have used Teamviewer quite a bit and truly like it for many reasons. I have mentioned this before here. However, recently, when at home on my home computer I have been using something called Chrome Remote Desktop. This is a newish Chrome app, that is, it is an app that works in the Chrome web browser. You can find the app at the Chrome Web Store here. I have to say that so far I have been pleasantly surprised, however, there are something I wish they would do better.

Pros:


  • .
  • It is a free application that goes right into the web browser.
  • It is quite simple, there is no other program that you have to worry about on your machine or anything that you have to make sure is, "on" before you go, you just click on your browser apps punch in the code and go. 
  • It seems to be just as fast as Teamviewer and Logmein.
  • There is nothing that I have read so far that tells me not to use this for business purposes which you cannot do with either Logmein or Teamviewer without paying for it. (At least you are not supposed to, and being an honest man, I don't.)
Cons: 
  • The biggest con for this app is that it doesn't work in phones or tablets. To say this another way, this app doesn't come in app form. For me this is huge, I want to use something like this for when I travel. At the present I can't do remote work using a tablet or phone without paying for it. If this came out in an app form it would be a big deal for me. 
  • It does not show multiple monitors well. I have three monitors at work, Remote desktop tries to show me all of these monitors at once when logged in at home, but I only have one monitor at home, so it shrinks the size to make it fit. Teamviewer does this well, it displays one monitor at a time and then puts a button on the bottom to move from one monitor to the next. At present, I have to shut down two monitors and just use a 1:1 monitor ratio when working from home. 
  • It (to my knowledge) is only available on Chrome. For me this is not a huge con, but it might be to someone else. With Teamviewer and Logmein, if you are on an unfamiliar computer and want to help somebody per say, it is a matter of logging on the website and signing in. With Chrome, you have to have a Chrome Web browser and the app installed on both computers. 

These are my thoughts, feel free to comment below your own opinions. 

Sunday, November 17, 2013

Timed Text Messages

Ok, all the way back to my first post ever I talked about how to create a mass texting list using Google Voice and your email you can find that here. This work well if you need to send a text out to a lot of people. However, what if you know you need to send a text, but you also know that you will be busy when you need to send it. (This also works well if you know that you are forgetful and will probably forget to send out the text.) The answer that I have found is to use something called, "GmailDelaySend." This is an App Script API. You can find it here. On the page you can also find instructions on how to install it and use it.

With this script installed and my set up with mass texting, I can now delay when the text message goes out. This makes it easier for me to send out the text messages when they need to be sent out instead of when I can get around to it.

By the way, this also works if you are sending out a weekly newsletter or something else that needs to be e-mailed out in a timed fashion. Have fun, post questions below I will answer if I can.


Thursday, November 14, 2013

E-Mail Clients (Thunderbird) and Google Calendar

Every so often in a blog like this I need to get specific. This is necessary because we do live in a very specific world and when one problem erupts it needs to be dealt with. Recently I had one of those issues with my e-mail client, Thunderbird. Thunderbird is an e-mail client (think, outlook, it downloads your e-mails for you and helps you to organize them.) However, I used Thunderbird for so much more. I use it to organize my calendars and my tasks among other things. Needless to say a few weeks ago Google announced that they were no longer going to support something called Caldav (Caldav is a system of calendar control used at times by various programs, such as Thunderbird)

Needless to say, this was a huge problem for me, this is how my work gets done, I keep my schedule and timing by using the calendar. It is true, I can simply go online and get it there, but compared to Thunderbird (in my opinion) this is less effective.

After a huge uproar from the Google community of users they decided to reinstate the use of Caldav, but created a different link system for its use and basically messed my entire system up. I tried and tried to figure it out, but continually ran into issues mainly coming from the Google end of the project.

To get around my issue I switched gears and began using another online calendar mechanism with my Thunderbird, it is called, ICal. This system is also very common and used my most calendar softwares. If you have a client other than Thunderbird and would like to set up a calendar system, feel free to ask below and I will try to create a post for you, or at least answer your question (I have experience with several client, I just prefer Thunderbird.)

Prepare Thunderbird by:

1. Download and install Thunderbird You can click here for the latest release.

2. Go to Tools and in the drop down click on "Add-Ons"

3. Search out an add-on called, "Lightning" it is for calendars. Click here to go to the webpage.
        i. follow directions to install

4. Search add-ons again for one called, "Provider for Google Calendar" Click here to go to the webpage.
       i. follow directions to install

5. Restart Thunderbird to complete install

Now to Install the Calendars in Thunderbird: 

1. Open both a webpage and Thunderbird.

2. On the webpage navigate to Google Calendars.

3. Select the calendar you want to have in Thunderbird, there should be an arrow on the right hand side click it.

4. From the drop down select, "Calendar Settings"

5. In calendar settings, toward the bottom should be a section titled, "calendar address" and three buttons one for XML, one for ICal, and one for HTML. Click on the one for ICal.

6. Once clicked a pop up should appear with an address and a warning not to give this address out. Save the address.

7. In Thunderbird, click File-> New-> Calendar. A box should appear.

8. In the box select "Network"

9. In the details you should have the option to include a Google Calendar (This is the, "Provider" add on, so if it is not there, then it is not installed correctly.)

10. In the box for Location, put the ICal link you saved.

11. Complete the rest of the process according to your liking. Once complete it will ask you to sign into your Google Account. (or the Google Account for the location of the calendar, if you are running several calendars share them all with your Google account for simplicity, this is what I do, so it is always my account.)

12. When you are done, it should all be there, and you should be able to add and modify events.

And there you have it, very specific instructions for a problem I had, and how I got around it.

Wednesday, October 30, 2013

Distributing Worksheets in a Digital Age

In the past I have talked a lot about making digital worksheets and so on and so forth. I have introduced you to Google Drive (at least when making tests or quizzes with Google Form.) However, with all of this there are times when as a teacher you don't just need the students to receive the worksheet, but you also need them to turn it back in. This can be a problem in the digital age. It can be really easy to get material out, there are a few ways to get material in, some of them are quite easy as well, but how do you do both. How do you send a worksheet out to the students digitally and then collect it again when completed.

To show you how to do this, I would like to get away from some of the more extravagant digital worksheets which I have made in the past. I do this for two reasons. 1. The digital worksheets I have done in the past were made more for self study and evaluation, the evaluation was to be done in a group environment as the class goes through the material. 2. Because of the overall setup there are no real great ways of getting the materials back. (I am working on a way around this, but I am not done yet.)

Step One: Make a Worksheet

This is the step that is pretty much all you. Navigate your way to Google Drive, if you don't have a Google account you should do that first. From there create a document. Title the document what you want and edit the contents to be the content of your blank worksheet.

Step Two: Create Template
There are two real ways to do this, if you plan to go to the templates homepage often, I would suggest installing the, "app." You can do this by clicking on the, "Create" button, in the drop down choose, "more apps" and from there type in, "Template" and look for the app titled (at least for now) "Drive Template Gallery" and install. Otherwise you can just go straight there by using the address,  https://drive.google.com/templates, from there you can click on the, "submit a template." At the top it will give you the option to select a Google doc to use as your template, click it and find your worksheet in your drive. Fill out the rest of the details and then submit.

Step Three: Distribute and Collect
After your template shows up (it may take some time for your template to show up under templates, so don't try to do this three minutes before class, you won't have enough time) click to see a preview of it. On the preview of the page you will see your worksheet and on top it will give you the option to, "use this template." This is how you distribute. You take the link to the preview of your template, you send out that link or distribute that link to the students and tell them to use that template for your assignment. When they click to use that template they will immediately have a Google document of your worksheet, they can rename it to whatever you tell them to. They can fill it out and do what they need to it digitally, because it is theirs. And then when they need to hand it in, they adjust the sharing setting. On the top right hand side of the document when opened, there is a blue button/link that says, Share. Have them click on the button and enter the e-mail address (Google address) that you want them to submit the finished worksheet to. When they do this and save, the document will now show up in your documents as well.

While I know how to do this, and have played with it a little bit to understand it, I don't use this the most often. In the future it is my hope that more of my digital worksheets will be made available like this, but there are kinks that still need fixing. That being said, don't be surprised if you find out that your students already know how to do this with relative ease. In terms of sharing documents and such with teachers this is being done on a regular basis in many schools. If you would like to test it out yourself I will post a link to a wordsearch template that I have made. This is not the best type of worksheet to use for a template, but it works as a good example in looking at how to share a template.

Wordsearch 6th Commandment

Wednesday, October 23, 2013

Google Sites: The Basics

Just like in real life, even on a blog I get distracted and forget my plans. At the end of July I wrote on how to create a free website using Google Sites and stated at the end of the blog that the next post would be on the basics of setting up your website. Well nearly two months and several posts later, here I am writing on that topic.

In this blog post we will be covering two main things: Page Layout and Page Content.

Page Layout: (Site Layout)
At this time we are not going into extreme detail. I am not for instance (at least at this point) telling you how to do wrappers and favicons. We are talking more about whether you want your navigation on the side or on top and so on.

To start sign into Google and navigate to your Google site and click on your site. From there you should see a white bar across the top. On the right hand side you should see a button that says, "More." Once you click you will see a drop down list. About half way down you will see, "Edit Site Layout" click it. At this point your white bar across the top will grow and have different selection.

You should see button at this point and be able to see if you want a custom header and where you want your navigation. Do you want the tabs to be on the top or the side. If on top choose "Horizontal Navigation" This is also where you can play around with how you want your website to look in general.

Page Content: 
Page content is quite easy to adjust. Over by the button that says, "More." There is an icon that looked like a pencil. If you click on it you will be able to edit the content of the page. You can type inside the particular areas.

Using the top bar you can insert things such as widgets into your content area. There are by far to many for me to explain here, but it is something worthy of your time. Perhaps in future posts I will talk about some of them and how they can be used.

If you click again on the, "More" button on the side and go to Page Settings. This will also enable you to change some of your page content in terms of whether or not you want to display the title, attachments and so on.

I know for many of you out there, this is painstakingly basic, but I think that is one of the pluses of Google Sites. And I hope that having simplistic posts like this from time to time will encourage others to venture out.

Wednesday, October 9, 2013

Syncing Calendars: Facebook and Google

Life in general is messy. If you are a product of this age it can at times be even messier. How are you supposed to remember an event that you were invited to on Facebook when it never appears on your calendar. I guess you could individually put each event on your Google Calendar, you could just forget, or you could find a better way to sync the calendars.

Luck would have it that there are ways to sync your Facebook calendar into Google (also Apple and Office if that is your thing.) This does not work (to my knowledge) the other way around, so hopefully you use Google calendar for your calendar and not Facebook.

Step 1:
Open up Facebook and navigate to the Events page. There should be an icon for your events on the left hand side underneath, "Newsfeed" and "Messages."

Step 2:
Click on the gear icon on the top right hand side. Note: there will be two gear icons, we are looking for the one that is next the event icon with the word "Today" by it. After you click, click on the word, "Export" from the drop down.

Step 3:
From the box that pops up, click on the calender you want, whether it is birthdays or events. A box will open that wants you to open Outlook, and it will have a web address that looks like this:

Webcal://www.facebook.com/ical/u.php?uid=************&key=*************

The stars of course being numbers. Copy it. 

Step 4:
Go to Google calendar, at the bottom there should be a section for, "other calendars." This section heading should have a drop down, click it. 

In the drop down there should be the option to add calendar by URL, paste the URL you got from Facebook in the box that pops up to add the calendar. 

Note: You will have to change the beginning of the web address from "webcal://" to "http://" for it to work properly. 

After that it should be there, you just have to adjust your other settings like normal. 

Enjoy. :) 

Friday, September 20, 2013

Uses of Google Drive Part 1-Import Range

Within Google Drive there are several useful things a person could do. I will cover some of them as I go, but today I wanted to specifically talk about the ability to Import Range. Inside Google Drive you can import part of one document into another.

 Let me give you an example, let's say your fundraising for a trip. You are not the only one going, there is also X, Y, and Z. You of course keep books of everything, how much money came in, how much money went out and so on and so forth. Every so often one of the people that are going as well asks you for where they are at. Now, more than likely you don't open up the financial books every single day, but only when you need to enter numbers, on top of that, you are not the only one entering numbers. Lets say you have a volunteer a parent of child X who is helping my keeping track of a certain fund raiser for you, and there is also someone else who helps as well, they all have numbers. We could periodically get all of those numbers together when a good opportunity arises (remember their volunteers, they are volunteers with busy lives) and then place them all onto a central sheet and then take those and split those into separate sheets for each individual (X, Y, and Z) and so on and so forth. And to think, this is only two volunteers and three other participants, imagine if we start increasing the numbers.

Obviously, one of the uses of password protected, cloud based documents would be to simplify the primary problem of having multiple people enter numbers. However, this still would leave us with the problem of getting the individual account balances and so on. Import Range is one way to solve this secondary problem. In a Google Drive Document you can create and individual document (spreadsheet) and tell it to import information from another. So you can set up an individual spreadsheet for X, Y, and Z and then tell it to take only that information that would apply to them. Of course you could then share that file with that person and they could see their balance information virtually anytime it was updated.

This example is of course only one use, you could also do this with a grade book, in my example dealing with page level permissions in a website, this is exactly what I was doing, I simply embedded the individual student document inside the webpage.

Enough talk, here is how you do it with a Google Drive Spreadsheet:

Create two spreadsheets, enter the information you want into one. On the other, in the cell block you want the information to appear (or start to appear if you are importing multiple cells,) you type:


=ImportRange("KEY*," "sheet#**! cell info***")


* Your key is the documents number. Every Google doc has one, as you look at your document link (web address) you will see this, "key=**********************#gid=0" all of the *'s here represent your, "key." This tells Google which document your are after.

** As with most spreadsheets, you can have multiple sheets, Google here needs to know which one you are looking at, if you don't make any change
s it will simply be, "sheet 1" however, you can name each sheet whatever you want, make sure to make appropriate changes.

*** The cell info is what cells you want to import is it B3-B10 or B3:B10 or something else, either way, Google needs to know.

In the end it should look something like this:
 (I have made changes to the key number, so this will not legitimately work.)

=ImportRange("0AtDRdV2hTfzqdHlCUjVoZUlpVBTEgDMzbnlobUlsZmc", "Sheet1!A3:A11")

Saturday, August 31, 2013

Classroom Rules!

After my last post on classroom procedures, I figured I would add a followup post on rules. Having classroom procedures is absolutely necessary, and will go a long way in classroom discipline. That being said there are some things that cannot be dealt with in the realm of classroom procedures. What if student one hits student two, having a classroom procedure and running through it again would hardly qualify in this scenario. When a student hits another, there must be consequences, there must be something that is done, and so, in the classroom, we must have rules.

Continuing where I left off, I don't think a classroom should have a lot of rules. Remember, most of your rules should be more procedures anyway. In my class I usually have around five rules. The rules are not complicated or hard to understand. For instance, one of my rules is that students should come to class prepared. The consequence for breaking the rule depend on the circumstance. If they forget their workbook, it might just be that they now have to complete the assignment at home instead of during class time. If they simply don't due their assignment it might be that they lose the homework points and their overall grade is impacted. In my classroom this coming year, my rules will be posted for everyone to see as well as a list of consequences. My rules will be:

  • Pay attention and follow directions the first time they are given.
  • Raise your hand and wait to be called on.
  • Do not leave the classroom without permission
  • Come to class prepared (pen, pencil, homework complete...etc.)
  • Keep your hands, feet, and objects to yourself.
I am sure that there are other thoughts on this, actually I know there is. I also know that my rules are far from perfect, but this post is a good way to start a discussion on the topic. Any thoughts? Suggestions? 

Saturday, August 24, 2013

Classroom Procedures

I know I am stepping into deep waters now. This blog is titled Tips and Tricks and I have for the most part stuck with tips and tricks on the side of computers and software. However, I would like to venture into the realm of teaching, by talking about something that helped me over night change my classroom. I should start off by saying that what I am going to be talking about is nothing new. You can find this in a plethora of educations theory and psychology books. I was first introduced to the idea of classroom procedure by a gentleman named Harry Wong. Both in his written work First Days of School as well as at his conferences, he talks a lot about classroom structure.

I know there are a lot of thoughts on this in terms of educational theory and practice. I will leave that for the professionals to discuss. Instead, I would like to focus on what it is and how it has worked for me.

The idea is quite simple. Don't make rules, make procedures. Every classroom must have some rules. However, if you are at all like me, you spend a lot of time making a lot of rules, when in fact you should be making procedures. To give you an example, you don't make it a rule that a person must stand in a single file line at the appropriate time, you make it a procedure. Now I know that sounds more like a semantics argument, but it's not. It is two different things, that in a classroom, you deal with in two different ways. When someone breaks a rule there must be consequences, there is a type of punishment no matter how small or tiny. On the other hand with a procedure, you simply repeat the procedure or even go through the procedure again and again. Approaching things from this direction will help so that you are not constantly looking to create consequences, but instead simply re-enforcing classroom procedures.

I am sure that this seems obvious to many of you, and rightfully so. However, looking at the number of books that are being written on classroom structure and discipline I imagine there are plenty of us out there that don't automatically get this.

In my own experience this one tip has truly made a night and day difference in my Confirmation classroom. I have from the start of my classroom teaching struggled to control a classroom. I always tried to create classroom structure, but where I went wrong was how I approached those who broke the structure. I always treated it like a broken rule. In the end, the students almost always felt they were breaking rules, half the time unintentionally. The effect this had was that eventually, many of them, simply didn't care for the rules. Structuring my classroom with this tip in mind has helped me to regain control, as well as have effective classroom discipline. Last year was the first full year of usage, and my largest class I have had, and it was also one of the most successful. I had more teaching time, less interruptions, and overall better classroom performance.

While there are a lot of changes I have made to my classroom from what I have learned, read, and watched/listened to, I would say that this one is the most important. There are still improvements I need to make, and I will continue to make these, and hopefully before I retire or die, I will have the best ever confirmation class plan in place. However, until then, I will simply make adjustments here and there, but this one on classroom procedures is a keeper. Any thoughts?

Friday, August 9, 2013

Page level permissions.

Have you ever wanted a site where certain people could see/edit certain sections, but not others. This is one of the features that is available in Google Sites. The use for this is endless, but at the bottom of the page, I will tell you one way I use it.

After you have created your Google site (for help creating a site see here) you can turn on page level permissions. On the top right corner of your page you will see a button that says, "more." Click the button and navigate down to the section that says, "Manage Site" and click. From there look for the side menu item for, "Sharing and Permissions." Once there, on the top right there should be a button that says, "turn on page level permissions." Click it.

Once page level permissions have been turned on you will notice that when you click on each page that you are given extra options. (Found on the left hand side of the sharing and permissions page.) Once it a page is clicked you will notice that on the mid-top right side that you can change the permissions. click on change and select one. I usually do the first option under the customs option. And then as I look at the list on the bottom I can adjust who can see/edit each individual page. Note to remember: now that you have page level permissions, unless you want it to stay with the same permissions as the main page, you have to edit each page.

How I use it:
I love this feature. It is one of my favorites of the Google Sites. With me, I use it with my confirmation class. I set up a separate page for each student. On that page I set up an embedded page with information, such as grades. (I will explain exactly what I do in a future posts.) I make each of the student pages accessible only to the parents of that student. I also make an information page with announcements for the class that is accessible to the all of the parents. I place a link on my main page (usually with the words or a picture that says "log in")

 to the information page,
this forces the parents to log in, and makes my announcements the first thing they see once they do log in. Once they log in, they also see an extra section on the top menu which is the tab for their child.


Monday, July 29, 2013

Free Websites and all that jazz.

This post is my first one to talk about building a free website through Google. Let me be clear from the start however, I know there are other systems to build free websites. In fact, there are several good site building tools out there. I use Google for two reasons: 1. because I use Google with so many other applications, I am comfortable with how they work, and I don't really have to learn knew things to build a site. 2. because I use Google with so many applications, the site builder that implements them the best (in my opinion) is Google sites. That being said, it is not the only site tool I use, in fact I use a local company with the church site that I administrate. However, in terms of free, I usually choose Google.

In future post I plan on talking about several of the features which I use and how I use them. The topics I have planned right now are:
Page Permissions (making pages inaccessible to some, but not others)
Iframe embedding (This is important for embedding documents, other websites...etc.)
Website Mapping (because the web address http://www.google.site/sansom/aldkjflj34lkj5ljl...etc just                                          isn't  friendly enough.)
Basics (This will actually probably be the first post or two.)

However, before we can look into any of those we need to create a simple site, in order to do this you start by going to Google. If you are signed in a black bar should be across the top. If you click on the more button a drop down list will show up, but Google sites still won't be there. So you have to click on the, "Even More" at the bottom of the drop down. This will take you to a page with a plethora of Google products. About the middle of the page you will find the, "Home and Office" section, and in that section, "sites."

Click there and go to the page. On the left hand side will be the big red button, "Create" Click it, and fill out the information. Make sure you look at some of the templates, you can always change things around if you don't like every thing about it. One that I use regularly is called, "Sunset." After this finish by typing the code at the bottom, and you have created your site. My next post I will take you though some of the basics of editing your site.

Wednesday, July 10, 2013

Digital Worksheet: Theory and Practice.

In the past I have told you how to create digital worksheets, I would like now to share with you a little bit in how I have used them. The theory behind why I created them the way I did, and how I implemented them in the classroom setting.

This blog is not to be an end all. The older I get and the more I read the more I learn and thus the more I change the way I do things. That being said I will probably be tweaking the way I do these worksheets in the future, but for now, here is the theory.

With the worksheets on Ruth, I designed them to be for group study as well as individual study. You can find all the worksheets on my website here. (The worksheets get better as they go, I made mistakes on the first worksheets that I will correct if I ever do this study again, the later worksheets contain less error.)

Each worksheet covers one chapter of the book of Ruth. In that chapter there may be different sections or topics that are covered and these are split into groups, while this can happen it doesn't always. Each chapter gives notes on verses. You can get to these notes by clicking on the verses. While not every verse has its own note, many of them do. They are there for quick reading. They are there so that some basic level understanding can be attained as one reads through the book.  As a person reads through the scripture and thinks of things, they can hit the, "Personal Study" button to jot down their thoughts either in the "First Read" section or the "Context/Notes" for after one has gone through the rest of the text. The Law/Gospel section is there for the student to critically think about the text if they can and separate it into Law and Gospel. If you click on any of these titles you will be taken to a page of explanation.

Also in this worksheet there is supplied some (not exhaustive) cross-references which can be seen by clicking on them. It should be noted that these are just the straight verses and for context it may be wise to actually look the verses up in the Bible.

The study notes are more the interpretive aspect. While these notes are not exhaustive it does give an interpretive framework to work with for the student. In my opinion this should be saved till the child works through the rest of the material, but it is only a suggestion.

Then there are the questions. I have two sets, one is personal, simple questions for the individual to answer on their own, on their own time. Then there are the group questions to be answered by the group in Bible Class, together.

On the practical teaching side of things you can do this in several different ways, from meeting in a coffee shop or restaurant to full on class, but to start you off, here is what I did:

Since I was making the worksheets I did not always get them out way in advance, however I tried to at least give them out two days in advance. Given that you will have all the worksheets you may give them out all at once, or at the beginning of the week to give them ample time to dig in.

During class while, sometimes I had technical issues, here is what I did. I hooked my computer up to our projection system and connected it to the church wifi. I then brought in my iPad connected it to the network and logged into my computer via Teamviewer (for an explanation of that see here.) Once all of this is established, I ran the worksheet on my computer. This enabled me to use the worksheet on my iPad while at the same time showing the kids how to use the worksheets via the big screen. I also did this with the group questions. So I would go through each section looking at some of the notes and cross-references each with the kids and then moved on to the questions giving a few minutes for the kids to talk with each other before coming together as a group.

The idea is to get the kids reading the scriptures, yet to approach it in ways they can adjust to, and explore. The tools provided in these worksheets is nothing exceptional, but in my class I found that many of the kids enjoyed it, especially since it was something they could explore and look at with their pace. If a student doesn't have an iPad/Tablet a study Bible in this case works just as well.

Tuesday, July 9, 2013

How to Stay in a Hotel Room Part 2

Note: All links point to Android Play store, many of these apps are available in other stores.

Well, the National Youth Gathering is over, 25,000 Lutherans (22,000 of them youth) gathered in one place, it was quite exciting. Next stop, St. Louis for the Synodical Convention. And again I will be in a hotel room for some time. Like many I like to travel, but I hate trying to pack everything, especially my lap top. This is why now days I just pack a portable keyboard and then work from my phone. When I say I work from my phone, obviously I can type and write and receive e-mails. However, sometimes I just really need to be on my computer.

For those of us who need to work on a computer, I use something called TeamViewer. Now I know, there are several different companies and brands out there, and depending on what your doing there may be a cost. That being said, I almost never use it for business, and usually what I do is limited and I don't need high quality mouse support, so I use TeamViewer. 

Others use Logmein and in all fairness this is a better product, but for Android users it also comes with a pricetag. ($30 for the app.) In my experience, log me in has better mouse support on devices and tends to have a more consistent image quality.

Either way, both of these are "free" to use for non-commercial purposes. Make sure you read up on what qualifies to stay within the confines of the law.

With Teamviewer you download it on all the devices you will be using, set up the way you want to use it, either by password or code. Since I am using my own computer, I have it set up by password so that I can sign in and be done with it (that is, anytime I am signed into my account I am signed into the computers.) The code can be used if you are offering tech support for a friend, but don't want your account tied in with their computer.

On my phone I connect via bluetooth a folding keyboard to type. I run this on an Android 2.2 which does not have HID support (what the keyboard uses) so I have to install another App called Blueinput (if you are trying this out, test it out before you purchase this app, your phone might be able to handle the keyboard)

This app (blueinput) also gives me mouse support but you have to go to the settings and switch it to "DPad" for it to work outside of the app itself. However, Teamviewer does not like the mouse support and crashes. (I have yet to try it with logmein so if anyone tries this let me know.

Monday, June 24, 2013

How to Stay in a Hotel Room: For Android Users.

Well, VBS is done and now as I look to my schedule I see that I will have a week in San Antonio for the National Youth Gathering starting in less than a week! On top of that, toward the end of July I will be in St. Louis for the LCMS Synodical Convention. For both events I will be staying in hotels. That means for two weeks out of the four in July I will be in a hotel room and away from home. Now, that doesn't mean that I will have a lot of down time so maybe I won't be in the hotel room all that much, but what if I am. What if I have some down time. If I do I want to be prepared, because otherwise hotel rooms can be wildly boring. I don't really watch a lot of TV so the whatever number of channels they offer really don't do much for me. I am not going to rents a movie or gaming system, and I can only spend so much time on my computer, before it feels more like work than down time, and that's assuming I want to lug my laptop around. Needless to say before I go I make sure I have two things functioning on my phone, a way to remotely log into my computer (I will cover this in my next post) and a working game system.


Everything beyond this point is based off my use of an Android 2.2 Motorola Triumph if you have a phone running below 2.2 (with some emulators also above a 4.1) make sure you check compatibility. 

How to set up a game system: 
Legal note: The whole world of ROMs and Emulators is sticky business as far was what is legal and what is not, Atari won a court battle in 1983 making it illegal to make your own personal Rom of a copyrighted game, but others have contended that this law does not restrict a person from having a ROM for personal use. For this reason, this blog will only tell you how to set up copyright free ROMs, ROMs that can be legally owned as stated by the companies themselves.

1. Search out the games you want online, specifically you are looking for something called a ROM which is an image back up of an old game. I would suggest checking out this website here for some classics.

2. Find an Emulator that will work with the ROMs that you want, in this case I have an Android device and so I downloaded this one.

3. After you install the app, take your downloaded ROMs which should be in a zipped file and place them where the emulator can find them, in this case that is:  /sdcard/ROMs/MAME4droid/roms folder.

4. Open up your emulator and follow directions (if it has them) to find your rom and then play.


If right now you are asking yourself about how this applies to staying in a hotel room then make sure you read the next part.

How to set up the game using controllers: 
For me I have wii remotes, the connect fairly easily and work well, however, really anything with a Bluetooth connection could work.

1. If it is just you, I suggest this free app here. If there will be others I suggest this app which is reasonably priced and can handle button mapping on multiple controllers.

2. Make your device, "discoverable" (for a wii remote, this means hitting the red button located by the batteries.)

3. Make sure that your wii remote is set to the input device, you should be able to do this through your app setup, otherwise go to settings/language and keyboard/ and select the wii controller.

4. Seek out mapping to map out your buttons, this may take a little prep work as you have to make sure that the buttons you have mapped are the same as the button configuration of your emulator. Some emulators give you the option to determine which button does what, others don't.

5. Once the buttons are mapped, make sure you locate in the settings where to hide the onscreen buttons.

Now all you need is to play the game, if you have the capabilities to run an HDMI out, you can connect this to the hotel TV. (The HDMI out is also nice for Netflix, but that is a different story.)  Make sure you check though, if you have a Samsung Galaxy S # your screen might actually be larger than the hotel TV.


A video of someone else playing some of those, "questionable" games. 


Wednesday, June 12, 2013

PowerPoint Magic- Make the link disappear.

I like Jeopardy and play it sometimes with my confirmation students, especially to review material. When I do (much like my worksheets) I set up the PPT with links to go to various slides (and then a link to return to the main Jeopardy Page) but how do I make that category go away then? Here's how:

1. Go to the Design tab.
2. Click on the "colors" on the right hand side, a drop down will emerge. Click on custom theme.
3. Now adjust the color of the slideshow to be whatever you want.
4. Make the "Followed Hyperlink" the same color that you chose for the background.

Now after you click on a category, when you return, it will seem as if the category is just not there. :)

Monday, June 10, 2013

Using PowerPoint in the Classroom: Part 1-Videos and Timed Classes


   Before I jump right into this one let me start off by conceding that PowerPoint is not the all powerful, wonderful, presentation viewer that encompasses life.

   There got that out. I say that sarcastically, yet every time I tell someone that I use PowerPoint I seem to get a lecture on why I should be using something else, whether it's, Proclaim, Media Shout, Prezi...etc. You get the idea. I have no problems with those other tools, I just have gotten accustom to PowerPoint (PPT) and so I use it, and I have gotten to the point where I can use it somewhat efficiently.

That being said I would like to spend at least a post or two talking about how I use it in the classroom. And some tricks that I have discovered over the years. Today's post is mainly going to focus on inserting videos into a slide show. Now, before someone points the finger and tells me that inserting a video into PPT is easy let me explain. I don't just insert a simple video into the PPT, I insert a video that plays in the corner of the screen as I go through material. That means not only do I need the video to play, but I need it to continue to play while I go through one or more slides, on top of that, I need it to play, which is sometimes a problem for PPT unless you know a few things.

If you are anything like me, you would want to know, why in the world you would want a small video to play in the corner of your slideshow while you went through other material. Why would this be worth knowing, and what possible use could it have in the classroom.

A couple years ago I watched/read some material by a gentleman named Harry K. Wong on how to structure a classroom. I do not plan to go into detail, but one of the things he brought to the table is that you need to have a STRUCTURED classroom, and the students need to be aware of the structure. The first step for me in that was to have a timed PPT for the class, making sure that we kept on target. The problem was one of how to let the kids know of that structure. For this, I created a timer, it is a video, and it is just shy of two hours long. It can be found here. If you have Realplayer or another peice of equipment you can download it and cut up the video yourself. Using video editing software I have cut that timer into several varying chunks of time and I place them in the corner of my PPT presentation so the kids know how long each section is.

How to Insert Video:
I am using PPT 2007, if you have another version write a comment and I will try to reply.

1. Click on the Insert Tab and find the icon that looks like a movie reel. This will bring a pop up where you can choose your movie file to insert. It will ask you if you want it to start automatically or on click, I always do automatic, but it doesn't matter at this point.

2. Once a video is inserted you can manipulate the size. I like to make it take up roughly one of the grid squares.

3. Being clicked on the video file you will see two extra tabs up on the very top, one picture tools, the other movie tools. If you click on the movie tools you will see a few options. One of those options is to play movie and it has a drop down. Your choices are Automatically, When Clicked, or Across Slides. I like to click on Across slides, and I do this because this way it will not stop when I insert other things such as animations into the slide. However, you need to make sure you adjust the number of slides, here's how you do that:

  • inset the video as before.
  • In movie tools click to, "Play Across Slides" as mentioned above.
  • Go to the Animations tab and click on the, Custom Animation, button on the bottom left of the ribbon.
  • click on your video in the toolbox, and then click on the drop down.
  • Click the, Effect Options This should bring up the Effect box with several options. in the stop playing section you can tell it when to stop, whether it be after one slide or several. 
    • Note: At least on my computer, this doesn't always work, it may be a bug in their system but either way, sometimes I have to do this three times before the correct "Effect Options" box appears. 
After you have accomplished this (after you insert the video, this part only works if you don't have it going across slides) you can go to the "Advance Slide" section under the Animations tab and choose for your slide to progress one second after your timer runs out if you want it do this automatically. Personally, I progress my slides myself to give myself wiggle room if a good discussion breaks out I then have the option to modify things.

One other special note: At least in Windows XP there is a known bug with certain videos and PPT, it has a conflict and will not play them, it is important that you preview your movie to make sure it works. If it does not and you need it to work, follow the steps below.


  1. Click the, "Start" button on the taskbar. 
  2. Click on Run.
  3. Type in, "dxdiag"
    1. This is your Direct X diagnostic tools, and this is where the conflict is happening. 
  4. Find the display tab and click it. (such as display 1)
  5. You should see a section about half way through talking about Direct X being enabled. Disable it. 
  6. Once it is disable check to see if your video works. The video quality may be slightly diminished (in my opinion it isn't too bad) but the video should work. 
  7. Don't forget after you are done to enable it again. :) 

Thursday, June 6, 2013

Digital Worksheets

One of the 8th graders brought his iPad into church the other week (that's right, they gave all the 8th graders iPads up here.) As I talked to him about how it was being used by the teachers, he basically broke it down to this, some use specialized apps for their material, some just basically hand out worksheets and some don't use it at all. Most of the apps that he showed me were not very exciting but then again, I did not get to see all of them.
One of the things I have noticed with youth (kinda like that 8th grader) is that they don't necessarily look at things the same way I used to when I was their age. This is not some philosophical break down of differing age groups, it is more of a commentary on things I have noticed, mainly as a result of smart devices.

It is because of some of these things that I have begun to differ my approach to worksheets. When I first started tampering with the idea of digital worksheets I was really just hoping to pass the information out to as many people as possible. Then I began to think that it would be neat if they could type in the work sheet and save it to their device. This was all I wanted when I first ventured in, but the more I looked into the more I realized I needed more. I needed more for two reasons, first, because why not, we have these devices that can store so much why not make use of it. Secondly, because the youth of today demand something interactive something that has functionality. The coolest thing about the Faithlife app (I reviewed the app here) is not that it is an online resource, it is that when I push the picture or hit the little plus sign more information pops out at me, and it is the information that I went looking for.

When it comes to making interactive digital worksheets the sky is the limit as far as capabilities. There are several different softwares out there that you can purchase and use that will help give you animation and anything else you want or need. As for me, I am cheap, on top of that, I don't want to make my Bible study worksheets the next Saturday morning cartoon, I just want to help people study the Scriptures. That being said I like to focus on buttons. That's right, I create buttons on my worksheet to make it seem more or less like a workbook that you can maneuver through.

Here is an example of one I made for Chapter 2 of the book of Ruth.

As you go through you will notice a few things. First of all, I am not perfect, the buttons are not all in exactly the same place, some of the formatting could use work but all in all, I don't think that it is that bad. Second you will notice that this is nothing but one huge (50 pages) pdf file. You will also notice that if you go through it page by page, some of it makes sense but not all of it. However, if you use the buttons you will notice that it all kind of flow together. You want to see the notes for verse one, click verse one and then click the back button to go back to the main study page. Those that had tablets really enjoyed these worksheets when we did this a few weeks ago. While I am not perfect, and maybe my process isn't the best one, I will outline what I did to create my worksheets below.

1. The first thing I do is create the worksheet in word, and when  I say create the worksheet I mean it. I do all of my design work in Microsoft Word. You don't have to do this, there are tons of programs out there to help you create pdf's (which is eventually what you will have to create.) However, I prefer MS Word, mainly because I am familiar with it, but also because it makes lining up text and images easier than others. I even create my buttons in word. I use the smart art (in the "Insert" section.) and then give them 3D properties. If you want to know how I do that, just ask. After this and saving the document, I go to the "save as" section of Word and publish it as a PDF.

Note: This first step takes a lot of prethought. Before I had the general outline of my worksheet thought out I had several failed attempts. Realize that every page you want in your worksheets should be there. So my notes for verse one might appear on page 6 or 20 but either way they are in this document.

2. The second thing I do is upload the document to a website: www.pdfescape.com. Once there I am able to insert links into a pdf document. When we think of links all too often we only think of them going to webpages, however, you can also set up links to go to different pages in the document. If you have caught on, great, if not let me flesh this out more. I create links in the shape of boxes, I then overlay those boxes onto my buttons. They are links that don't go to webpages but instead go to different pages within the document. Remember though, once your reader is to the page they need to be able to get back to wherever they started, so while you have a button to get there, you also need a button to get back.

Notes: pdfescape does have limitations, it has a certain size limit, but it also has a page limit (100pages.) While I have never had issue with the size issue, the page limit has limited me at times due to the nature of these worksheets, some of my pages don't have a lot on them, but are needed for the flow and design of the worksheets.

3. The third thing I do is actually insert form boxes as well. The fillable form boxes will give people the ability to type into the pdf and save it so they can find their notes later.

4. Finally, I upload the document to a dropbox account I have. If you go online, you can get a download link for the worksheet, I take that link and then use Google's url shortner to create a QR code. That code is displayed at the beginning of class, but I also post just the link on Facebook, and on the church website for those that don't want to deal with qr codes.

Well, there is how I do it anyhow. If you have another way, or a better way, feel free to share below. I don't claim my way is the best, I just claim that my way works for what I need/needed at the time.
Saturday, June 1, 2013

Review: Faithlife from Logos

It seems almost impossible sometimes to pull kids away from their phones these days. It's even worse if they have a tablet and it is connected to the internet. My approach to this dilemma over the last couple years has been not to ignore it or be strict about it, but instead to find ways to utilize it. I have created worksheets that work on tablets and are filled with fillable text boxes and clickable links. When we play trivia games, or review for a test I make the kids text me the answer (unless it is a really long winded one.)

I also like my gadgets. I love my phone even though it already needs to be replaced. I am on my computer a lot, and while most of the time it is work related, not always.

It is for these reasons among others that I will do an app review when I find a good one (or a really bad one.) The first one on the docket is called Faithlife.

Faithlife works on virtually any device iPad or Android and is put out by the Logos company. I have the Logos Bible Software so six or so months ago when they advertised the Faithlife Study Bible and were giving it away, I of course jumped on it. It was a little premature at the time. When I signed up and downloaded it, the app just felt clunky and unrefined, so I dismissed it and didn't think about it again until a few weeks ago.

A few weeks ago I was in my office trying to brain storm on what to do about the college dilemma. You know, where your high schoolers go off to college and then you don't hear from them again until, if your lucky, they have a wife and want to get their child Baptized. As I was thinking about this it dawned on me that maybe the Faithlife Bible might be the answer. You see Faithlife isn't just an app it is an entire online community built around the Faithlife Bible. So I re-downloaded the app and was pleasantly surprised, but not blown away, by what I found.

Review:

The app is connected to an online community called faithlife, at www.faithlife.com. The community seems to be designed around a Facebook like approach, but has several features that integrate the Bible reading and study at the center of the community. The Bible itself is the Lexham addition which the website claims is rigidly literal. At this point I have not done enough research to confirm or deny this. The study notes are well done in a tier system. You can click on the end of a note with a plus sign and get another teir on the topic or verse. They can have up to three tiers. The notes are also filled with pictures, videos, infographs, and a dictionary. There are other resources as well, but they have to be purchased.

Pros: Everything in the app is well integrated, if you write a note about a passage you can keep it private or you can share that note for everyone to see in the community notes. It can help make Bible study in groups easier by setting up reading plans. The app will remind you where you are in the reading plan at the home page. There are also options for shared prayer lists, so that you can pray as a group and keep people integrated with what is going on. It can make Bible study possible with groups that struggle to make meetings (such as college, young families, etc.) I also like how the app and the community is really centered around the Bible instead of something else.

Cons: The app is still in its beta stage. In this case it means they don't yet have all the features out, but they are getting closer every day. However, the app still has room to improve. The app is a little crowded for phone use. While it is possible to use on a phone, even effectively, it is best on a tablet. The app allows you to start a reading plan but has little selection. If you have Logos software, you can make your own and send it to Faithlife, but what about the person who doesn't have the software. Most of the cons are small, with one large one in my opinion. They don't let allow you to upload your own material in a readable form. What I mean by this is simple. Right now you can upload word documents, pdf....etc and share them with the community and your groups. However, You cannot create anytime of reading list with them or integrate your own material, you can only do this with their material. While it is nice to be able to upload my Bible studies, I would prefer to make them readable document. This in the end forces a person to purchase their Bible studies if they want to use this feature. The reason this is important to me is because I am thinking of utilizing this app with tablets and phones which do not necessarily go well with downloading a pdf or word document.

In spite of the pitfalls, I give the app 7 out of 10 stars. Once the rest of the promised features are complete that will probably move up to 8 out of 10. If they ever let me upload my own Bible studies to share with other inside the app I would give it a whopping 9 out of 10, but I won't hold my breath. Regardless it is definitely something worth checking out.

For Android                                                 For Apple                                             For Kindle Fire

Tuesday, May 28, 2013

Having some fun with GV Part III

We have gone over several aspects of Google Voice (GV) in the last several blogs. In this post I will finish up this series with one more feature that I have found useful. This feature is also not the most commonly known, but people have been increasingly finding out about it.

To start let me set out a scenario for you. I am a pastor by trade and while there are scenarios where something like this would and have been useful, they would be fairly unique to the rest of the world. That being said, let me give you a more typical scenario. Let us say, that you are starting your own business, or have your own business. In that business you don't really have enough money to have your own separate phone line, and while maybe you have a home line and a cell line, it can be hard to separate your personal life from your business life. On top of that, people call at all hours, it is the world of websites nowadays, and sometimes people have questions at 3 am. You turn your home phone off, you turn your cell off, but now you have another problem, what if an emergency happens in your family, how will the contact you. I guess you could just direct all traffic to your cell, but, then what happens the one time you forget and leave it on?

Within this scenario you would want your phone to ring with business or personal certain hours or days and then you would want business to go straight to voicemail and personal calls to go through the rest of the time. With GV this is possible if you set up your GV account and make it your business line. From there you could set it up to have a special business voicemail through GV, and you can have it forward calls to your home phone, cell phone, or both. However, you can also tell it to ring those phones at certain times, and then the rest of the time go straight to voicemail. You can even set it up on a schedule so that it does things the same way every week.

Log into your GV account and go to the gear icon in the top right as before. This will get you to your settings page. On your settings page you should see the first tab, phones. On your phones you will see the option to, "edit" them. If you click on that you can scroll down towards the bottom and you should see options for ring schedule. Here you can tell GV to ring this phone (the phone you are editing) on the weekdays, on the weekend or not. You can also set a custom time schedule on when to ring that phone or when not to. During the non-ringing times it will go straight to voicemail.


Special note to the pastors or church leaders in my midst. I use this at times when I am doing intense work, such as sermon writing. Since I have it set up to forward my voicemails to e-mail (also text) if it is something important I will still get it, but my phone will not ring. However, I don't use these weekly scheduled rings. I use what is called, "Do Not Disturb" which can be found in the, "Calls" Tab in your settings. The reason I use this and don't just turn off my phone is because I tend to forget to turn it back on, this is timed so it comes back on automatically.

Friday, May 24, 2013

Having some fun with GV Part II

I have had two post thus far that reveal ways to use Google Voice (GV). In both post, the person using the tool had no need to actually utilize GV for their phone system. However, what if you do, what if you decide that GV is for you now what, what are some of the features that you can use, and are they really all that special?

In this post I would like to cover to features that I have found useful. So if you decide to use this Google resource here are some things to keep in mind.

The first feature I would like to bring to your attention is actually the main function of Google Voice. With modern cell phones and the ability to sync your cell phone with Google Voice, the original purpose of GV has somewhat been lost. GV is primarily a phone Forwarding application. It is designed to ring your phone. It is designed so that when someone dials your GV number, that call is forwarded to the phone of your choice whether that is your home phone or your cell or what have you. This first feature is important. While you can sync it up with your cell phone, you can also forward your calls to you home or your work or whatever you wish You will also notice that you can forward your calls to your Google Chat. Forwarding your calls to your Google Chat might seems a little silly, in actuality, for me, it has become a gem in the rough.

If you have it set up to forward to Google Chat I have found it nice to be able to answer my phone calls on my computer, all you need is speakers and a mic of some kind (most webcams have them, many computers have them built in). In order to accomplish this all you need is at least one webpage open to Gmail, or G+ unless you are running a Google Chat program by itself.

Google Chat is essential to receiving calls via VoIP. Now being as frugal as I am, I only have three hundred talk minutes on my no contract phone, yet I talk on the phone all the time. I do this because right now through Google Chat, VoIP is free in the US. So, having set up my account, I download an app onto my cell phone and as long as I am on WiFi (or your data plan 3G is not good enough, but 4G works) I can talk as long as I like without using my minutes up. (To answer your preemptive question, the answer is yes, anything that can handle a web browser, has a mic and speakers can be made into a phone using this.) The best apps on your smartphone or tablet that I have found are the GrooveIP app for Android and Talkatone for Apple. Both have free versions.

Well, that is the first feature that I want you to take note of. The second will have to wait till tomorrow for Part III of this series.

Thursday, May 23, 2013

Having some fun with GV

So you've set up your mass texting with Google Voice, and with your Google account you have also set up several quizzes or tests. However, there has to be more you can do with this resource. Well, for this post I will alert you to one more. It is a feature of Google Voice that while out in the open, most of us (from those I have talked to) are unaware. It is a feature to set up an individual voicemail per group. So lets say as you make your contact list in gmail, and you make group one. In group one you place one or more contacts, including phone numbers. Now go to your Google Voice (GV) main page. Click on the gear icon on the top right hand side, click on settings in the drop down. In your GV settings page you will see a top tab for Voicemail and Text. In this section, you can record new greetings, when you click, "record new" you will have the option to name your greeting, and then GV will call you and give you instruction to recording.

After you have recorded your greeting go to the, "Groups and Circles" tab. Once there you will see the option to, "edit" the contacts, anonymous, or any of the groups. If you hit the edit button you can click from a drop down and choose which greeting the person will hear. With that setting, every person in that category will hear that greeting, so everyone in group one, will hear the greeting for group one if they call and you don't pick up

The implication for the use of this could be exhaustive. One use I have used is for giving confirmands their grades on certain things. It takes a little bit to update, but if you don't give grades but twice a year, it isn't that bad. It can also allow you to give one greeting for your family and another for when the office calls.

I have also used this to create a scavenger hunt for my high schoolers during a lock in, but that will have to wait for a few more features before I show you how to set that up.

Saturday, May 18, 2013

Quizzes/Tests Part 2

If all you need to do is create a quiz or test to grade or have it graded for your students, see my first post on how to do this by running a script on Google Forms here. However, lets just say you are wanting to create a curricula based off the idea of self assessment at home. That is to say, you want the parents and the students to do it together at home. On top of this you want them to be able to get their grade immediately. Using my other method this simply would not happen. Instead, they would have to wait for you to grade the test using the script.
Last time I mentioned that there was another method I used by sending wrong or right answers to different pages. In this post I plan on explaining what I meant by that and show how to set a small quiz or test up. This method is a longer process, in my test it took just under an hour to set up a 5 question quiz/test.

To start with let me explain what I am talking about. In a Google form you can tell the form to go to a certain page based on your answer. Using this, I can tell the form to send all the wrong answers to one page and all the right answers to another page. What it looks like is this.


With this chart you can see that every question leads to a specific page/slide which enables you to place a percentage grade for the last question which could then be displayed. This is my first chart, for me I think I may save the name/email address for the last question.

While creating all the pages can be a hassle, Google forms does allow you to to duplicate and drag and drop questions making it easier as long as all the questions in that tier are the same. If you want to be creative you can make each question different thus making every quiz unique based on if they answers right or wrong.

Other than the creating of questions, this is not difficult to set up.


When you first pull up or add a question, you will need to check two boxes. The first is a box that allows you to tell the question to send the person somewhere based on thier answer. The second is to make sure the question is required (if you don't make it required they will be able to skip it and the quiz/test will not flow correctly.) You will need to make sure it is multiple choice in this scenario.

Once your pages are created you can go back to each question and tell it what page to go to. you can do this by clicking the dropdown and telling it what page it will lead to.


I have an example for you to click through which I will embed below. A couple things to note: 1. To my knowledge you cannot disable the, "back" button, so they can go back at any time and answer the questions. 2. With number 1 in mind, when I created this I placed the number wrong in the "help" area, this is for your purposes to see where each question leads and how it keeps track. 3. I am slightly embarrassed at the overall quality of the questions, I put this together quite fast and did not do a lot of proofing. 4. When I first created this, I did not know how to end the quiz so it ends with an ungraded essay questions. In the future, as I said above, I think I will end by asking for name or e-mail.

there ya go, have fun.

Tuesday, May 14, 2013

Free Virtual Tours!!

You are at a church/school/whatever, and you want to make your website look classy by adding a virtual tour, but how do you do it? You do a Google search, there are several companies offering "free" tools, but how free are they? Well, allow me to introduce you to Photosynth by Microsoft.

Photosynth is a free tool that can be utilized for all kinds of things and is quite fun to play with. However, it also gives you a free option for virtual tours. After you get done making your Photosynth on the bottom of the screen it will give you the embed code to place into your website. The code is handy if you are like me and you have little coding skill. Take a look at St. Mark's Preschool classroom.


But what if you decide that you don't like the choppy look of Photosynth. Well, if you would download a program called Microsoft Image Composite Editor you would be able to take your pictures and stitch them together to make a panorama photo (Note: if you have a camera that does this for you, don't bother with this, your camera will do a better job.) Once the image is stitched you can upload it to Photosynth and it will take care of the rest. Take a look at St. Mark's Sanctuary during Advent.


Either way, it is a cheap way to give people a feel for your church/school/whatever and really is user friendly.  What are some other ways you use these products?

Thursday, May 9, 2013

How to create Quizzes/Tests with a Google Form

Over the last couple weeks I have been trying to find a way create an online class/course. The objective would be to create assignments for the confirmation students to do at home with their families. It is something that is still in its infancy in my mind, which is part of the problem. I want to test it, I want to make a few and test them with some people before I implement such a thing.

The problem is one of costs. Most course builders cost money, a lot of money. WebCT or Blackboard is not cost effective unless you are a school. The City came out not to terribly long ago with the ability to design and build courses, but they have you pay according to the size of your weekly attendance at church. Our monthly bill would be $163, which is quite the commitment when you aren't even sure about it yet.

There are some that cost no money at all, such as Moodle or even Google Course Builder, but with these you need to know at least some code. I know none, other than what I have picked up here and there. In the midst of this, I have an idea of how to manipulate a Google form to do what I need it to do. I take each question and make it go to a different page depending on whether or not the person answers correctly or not. A lot of work you might think, it was. However, I was still faced with yet one more problem. How do  I stop the students from simply going back and changing all their answers around once they are done or almost done. In my need to find this answer I stumbled upon something better.

I kept searching for, "quizzes" or, "test" when in fact Google calls them, "Self Grading Assessments." You can set up a Google form, download a script called, "Flubaroo" on your form response page, and then tell the script what the answers are, it can even due text answers.  It grades them, and so much more. If one of your questions is for an e-mail, it will email the students test results to them, after you run the script. It will also tell you if more that 60% of the class got a question wrong. Rather than try to explain to you how to set this up, I figured I would just embed the video that I watched. Enjoy.

Wednesday, May 8, 2013

The Beginning and Free Mass Texting.

Alright, so I thought about this for some time and have decided to start one more blog, I have several others, they always start with the same good intent and then trickle down into nothing after awhile. It is usually sometime after this that I revisit them in the graveyard. I am of course hoping that this blog doesn't turn into that, but hey, who knows the future.

The point of this blog is simple, to give what I know to anyone who cares to know it, and to learn from anyone who has a better method. Right now I am a pastor at a roughly 1000 member church. I work mainly in Youth and Evangelism, but like many churches a good deal of my time goes to updating and bringing the church into this century. Over the last five years, I have learned several tricks. Many of them came from other blogs, some of them just came from my own creativity (I am sure they are in a blog somewhere, I just never read it.) Most of these tips and tricks come from either just using, or manipulating tools that are out there. Most of these tricks are free, or at least free at this time.

The first trick I have learned and want to talk about is Mass Texting. If you are like me, I am at a church that would love to have this capability, but doesn't want to pay for it. If you are at a church that has the resources and means to pay for it, and they want to, a paid product is going to be better. However, if you are cheap, keep reading.

Google Voice is free (at least right now it is, and I do not think they plan to change that quite yet.) With Google Voice you can get a free number, send free SMS text messages. It also has free VOIP which we will talk about in later posts. The problem is that you can only send five SMS per time, they do this because if your system were hacked or you were opening a spam account you could text like crazy to limitless people. Five text at a time is not very conducive if you say, want to send 100 text out or so. However, Google Voice has a very interesting feature that they offer to help you out, and that feature can be manipulated to create free mass text messages. The feature you ask? It is their text to e-mail feature.

At your Google Voice homepage if you click on the gear icon on your top right and go to settings and then the, "Voicemail & Text" tab you will find the option. It is called text forwarding, and it forwards your text to your e-mail, but here's the thing, that would be useless unless Google was awesome and allowed you to text back using the same e-mail and, in this case, they are awesome. So here's what you do, you send a note out, telling everyone that if they want to be a part of your Church Mass Texting, they are to send an text to your Google Voice Number, I like to have them put their name in the text so I can add it to the contacts list. When they do that, Google will generate a specific e-mail for that person and number, save that e-mail address and label it as one of your contacts (this is where the name comes in handy.)  Create a group to e-mail and fill it with those addresses. Now all you have to do is e-mail that list and it will turn it into a text for the people on the list.

Of course with all things, there are limits, I think that as long as your not using a client (Thunderbird, Outlook...etc.) you can send like 2000 emails a day, so no more than 2000 people can be texted...sorry But if you are mass texting 2000 people and can't afford to use a paid product there may be other questions to be asked. :) Anyway Hope this helps someone.